基于物理的力反馈[实验]
以前的示例渲染了平面或球体等原始物体,其中的力反馈计算由于简单而采用手工编码。 力反馈计算由于其简单性而采用手工编码。随着物体变得越来越复杂,手工 计算变得繁琐复杂。SOFA、IMSTK 和 CHAI3D 等物理引擎针对触觉应用进行了大量优化。 等物理引擎针对触觉应用进行了大量优化,可在 1000 Hz 以上的频率下执行 但它们需要集成到 Unity 中。Unity 有一个内置的 物理引擎,可用于简单的模拟。本文将展示如何构建触觉 场景,并将物理引擎整合到触觉模拟中,使用运动和非运动 对象。
导言
Unity 有两种类型的 RigidBodies(运动型和非运动型)。运动物体由 脚本控制,如前面示例中的光标。相比之下,非运动体受 碰撞和由此产生的力来控制。难点在于如何在用户和非运动物体之间交换力数据,以及如何在用户和非运动物体之间交换力数据。 和非运动物体之间的力数据交换,因为力输入和力输出都无法直接测量。 直接测量。
为了解决这个问题,我们使用 ConfigurableJoints 创建了一个虚拟联轴器,通过由弹簧和阻尼器组成的虚拟连杆机构将运动物体和非运动物体连接起来。 机械运动物体和非机械运动物体之间的虚拟连接,虚拟连接由弹簧和阻尼器组成。 实际上,当一个非机械运动物体与另一个非机械运动物体发生碰撞时,它会 运动物体将继续运动,拉伸弹簧并产生一个力。 产生一个力。我们可以直接使用产生的力来渲染物体。
场景设置
实现这一点需要同时使用两个对象:
- 光标对象(运动学),它将与设备的光标位置相匹配
- 物理效果器(非运动式),它将通过固定关节与光标对象相连。 对象通过一个固定关节连接起来。
设备渲染的力将相对于这两个物体之间的距离,因此 这样,当物理效应器对象被场景中的其他对象阻挡时,就会产生一个与光标对象距离成比例的反作用力。 力与光标对象的距离成正比。
- 如《入门指南》所示,添加触感线程和光标。
- 创建一个工作区,如工作区缩放和放置中所示。
- 在 "触觉工作区"下创建一个名为 "物理效应器"的球体,其变换值与光标相同。 与光标的变换值相同。
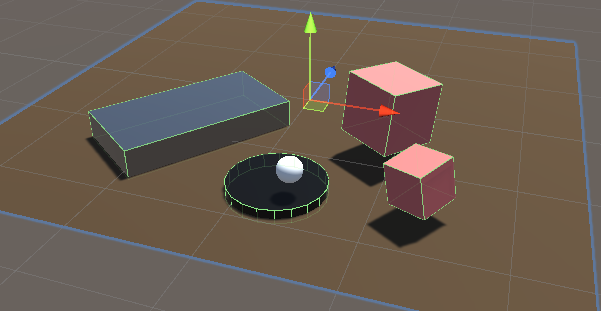
- 在场景中添加带有碰撞器的各种 3D 物体。
- 添加一个具有刚体的立方体,其重力已启用,质量为
1000.

可选:您可以设置内置的
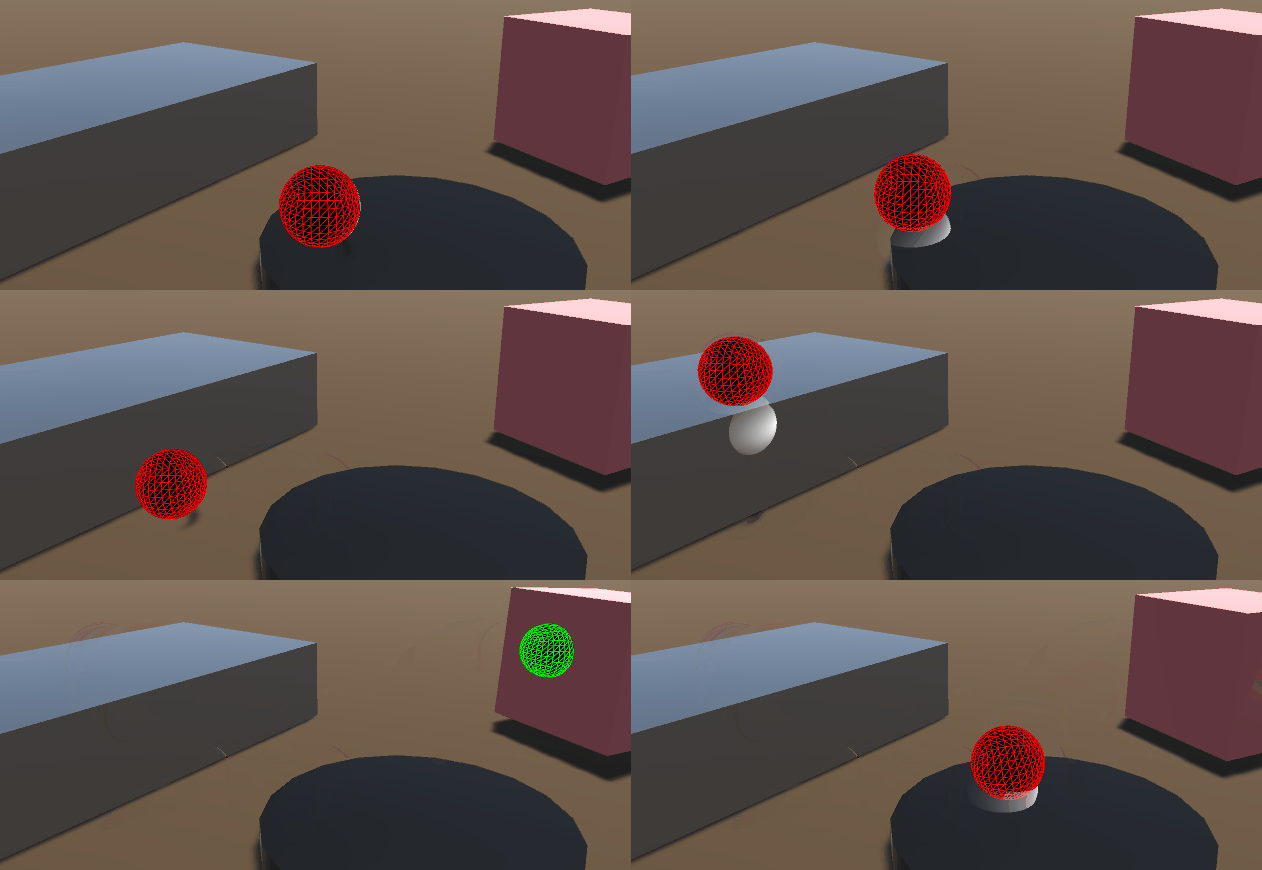
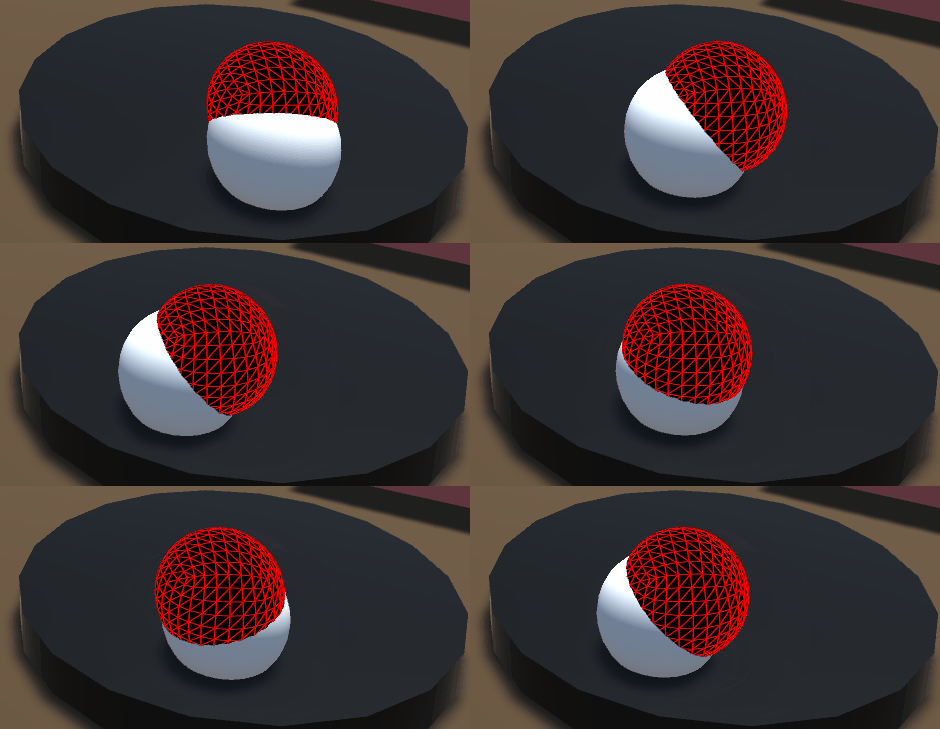
SpatialMappingWideframe材料 物理效应器 看看球体在表面移动时是如何因为摩擦力而旋转的。 摩擦力。
简单的物理触觉回路
添加新的 C# 脚本 人称 SimplePhysicsHapticEffector.cs 到
物理效应器 游戏对象。该脚本的源代码如下。
using Haply.HardwareAPI.Unity;
using UnityEngine;

public class SimplePhysicsHapticEffector : MonoBehaviour
{
    // Thread safe scene data
    private struct AdditionalData
    {
        public Vector3 physicEffectorPosition;
    }

    public bool forceEnabled;
    [Range(0, 800)]
    public float stiffness = 400f;
    [Range(0, 3)]
    public float damping = 1;

    private HapticThread m_hapticThread;

    private void Awake ()
    {
        // Find the HapticThread object before the first FixedUpdate() call.
        m_hapticThread = FindObjectOfType<HapticThread>();

        // Create the physics link between the physic effector and the device cursor
        AttachCursor( m_hapticThread.avatar.gameObject );
    }

    private void OnEnable ()
    {
        // Run haptic loop with AdditionalData method to get initial values
        if (m_hapticThread.isInitialized)
            m_hapticThread.Run(ForceCalculation, GetAdditionalData());
        else
            m_hapticThread.onInitialized.AddListener(() => m_hapticThread.Run(ForceCalculation, GetAdditionalData()) );
    }

    private void FixedUpdate () =>
        // Update AdditionalData
        m_hapticThread.SetAdditionalData( GetAdditionalData() );

    // Attach the current physics effector to the device end-effector with a fixed joint
    private void AttachCursor (GameObject cursor)
    {
        // Add a kinematic rigidbody to the cursor.
        var rbCursor = cursor.GetComponent<Rigidbody>();
        if ( !rbCursor )
        {
            rbCursor = cursor.AddComponent<Rigidbody>();
            rbCursor.useGravity = false;
            rbCursor.isKinematic = true;
        }

        // Add a non-kinematic rigidbody to self
        if ( !gameObject.GetComponent<Rigidbody>() )
        {
            var rb = gameObject.AddComponent<Rigidbody>();
            rb.useGravity = false;
        }

        // Connect self to the cursor rigidbody
        if ( !gameObject.GetComponent<FixedJoint>() )
        {
            var joint = gameObject.AddComponent<FixedJoint>();
            joint.connectedBody = rbCursor;
        }
    }

    // Method used by HapticThread.Run(ForceCalculation) and HapticThread.GetAdditionalData()
    // to synchronize the physic effector position information between the physics thread and the haptic thread.
    private AdditionalData GetAdditionalData ()
    {
        AdditionalData additionalData;
        additionalData.physicEffectorPosition = transform.localPosition;
        return additionalData;
    }

    // Calculate the force to apply based on the distance between the two effectors.
    private Vector3 ForceCalculation ( in Vector3 position, in Vector3 velocity, in AdditionalData additionalData )
    {
        if ( !forceEnabled )
        {
            return Vector3.zero;
        }
        var force = additionalData.physicEffectorPosition - position;
        force *= stiffness;
        force -= velocity * damping;
        return force;
    }
}
在这种设置下,您应该能够感受到场景中的每个物体,较重的物体会产生更大的阻力。 阻力。

问题
- 摩擦/拖拽感是由于 Unity 物理引擎(60Hz 到 120Hz 之间)和触觉引擎的更新频率不同造成的。 的更新频率不同造成的。 线程(~1000Hz)之间的更新频率不同造成的。这种差异意味着物理效应器将始终 滞后于光标的真实位置,从而导致作用力类似于阶跃函数,而不是连续的。 阶跃函数,而不是连续的。
- 移动物体上没有真正的触觉。
解决方案
- 降低
ProjectSettings.FixedTimestep接近0.001尽可能 尽可能。这一变化将对复杂场景的表演产生重大影响。 场景。 - 仅在发生碰撞时才施力(见下一示例)
- 使用第三方物理/触觉引擎(如 TOIA、SOFA 等)作为 unity 物理引擎和触觉循环之间的 作为 unity 物理引擎和触觉环路之间的中间件,以更高的频率模拟接触点。 以更高的频率模拟接触点。
更先进的物理触觉回路
在这个例子中,我们将
-
使用碰撞检测输出,避免在效应器未接触物体时产生摩擦/拖拽感 的感觉。
-
可配置关节(ConfigurableJoint),在两个效应器之间设置了限位、弹簧和阻尼器,而不是固定关节(FixedJoint)。 而不是固定连接。这样我们就可以使用 Unity 的 物理材料为场景中的物体设置不同的摩擦力值,并通过可移动物体的质量感觉 并通过力反馈感受可移动物体的质量。
在 物理效应器 游戏对象,替换
简化物理触觉效果器 脚本组件的 C# 脚本
人称 AdvancedPhysicsHapticEffector.cs
using Haply.HardwareAPI.Unity;
using System.Collections.Generic;
using UnityEngine;

public class AdvancedPhysicsHapticEffector : MonoBehaviour
{
    /// Thread-safe scene data
    private struct AdditionalData
    {
        public Vector3 physicEffectorPosition;
        public bool isTouching;
    }

    public bool forceEnabled;

    [Range(0, 800)]
    public float stiffness = 400f;
    [Range(0, 3)]
    public float damping = 1;

    private HapticThread m_hapticThread;

    // Apply forces only when we're colliding with an object which prevents feeling
    // friction/drag while moving through the air.
    public bool collisionDetection = true;

    private List<Collider> m_Touched = new();

    private void Awake ()
    {
        // Find the HapticThread object before the first FixedUpdate() call.
        m_hapticThread = FindObjectOfType<HapticThread>();

        // Create the physics link between the physic effector and the device cursor
        AttachCursor( m_hapticThread.avatar.gameObject );
    }

    private void OnEnable ()
    {
        // Run haptic loop with AdditionalData method to get initial values
        if (m_hapticThread.isInitialized)
            m_hapticThread.Run(ForceCalculation, GetAdditionalData());
        else
            m_hapticThread.onInitialized.AddListener(() => m_hapticThread.Run(ForceCalculation, GetAdditionalData()) );
    }

    private void FixedUpdate () =>
        // Update AdditionalData with the latest physics data.
        m_hapticThread.SetAdditionalData( GetAdditionalData() );

    /// Attach the current physics effector to the device end-effector with a joint
    private void AttachCursor (GameObject cursor)
    {
        // Add a kinematic rigidbody to the cursor.
        var rbCursor = cursor.AddComponent<Rigidbody>();
        rbCursor.useGravity = false;
        rbCursor.isKinematic = true;

        // Add a non-kinematic rigidbody to self.
        var rb = gameObject.AddComponent<Rigidbody>();
        rb.useGravity = false;
        rb.drag = 80f; // stabilize spring connection

        // Connect self with the cursor rigidbody via a spring/damper joint and a locked rotation.
        var joint = gameObject.AddComponent<ConfigurableJoint>();
        joint.connectedBody = rbCursor;
        joint.anchor = joint.connectedAnchor = Vector3.zero;
        joint.axis = joint.secondaryAxis = Vector3.zero;

        // Limit linear movements.
        joint.xMotion = joint.yMotion = joint.zMotion = ConfigurableJointMotion.Limited;

        // Configure the limit, spring and damper
        joint.linearLimit = new SoftJointLimit()
        {
            limit = 0.001f
        };
        joint.linearLimitSpring = new SoftJointLimitSpring()
        {
            spring = 500000f,
            damper = 10000f
        };

        // Lock the rotation to prevent the sphere from rolling due to friction with the material which will
        // improve the force-feedback feeling.
        joint.angularXMotion = joint.angularYMotion = joint.angularZMotion = ConfigurableJointMotion.Locked;


        // Set the first collider which handles collisions with other game objects.
        var sphereCollider = gameObject.GetComponents<SphereCollider>();
        sphereCollider.material = new PhysicMaterial {
                dynamicFriction = 0,
                staticFriction = 0
        };


        // Set the second collider as a trigger that is a bit larger than our first collider. It will be used to
        // detect when our effector is moving away from an object it was touching.
        var trigger = gameObject.AddComponent<SphereCollider>();
        trigger.isTrigger = true;
        trigger.radius = sphereCollider.radius * 1.08f;
    }

    // Method used by HapticThread.Run(ForceCalculation) and HapticThread.GetAdditionalData()
    // to synchronize the physic effector position information between the physics thread and the haptic thread
    private AdditionalData GetAdditionalData ()
    {
        AdditionalData additionalData;
        additionalData.physicEffectorPosition = transform.localPosition;
        additionalData.isTouching = collisionDetection && m_Touched.Count > 0;
        return additionalData;
    }

    // Calculate the force to apply based on the distance between the two effectors
    private Vector3 ForceCalculation ( in Vector3 position, in AdditionalData additionalData )
    {
        if ( !forceEnabled || (collisionDetection && !additionalData.isTouching) )
        {
            // Don't compute forces if there are no collisions which prevents feeling drag/friction while moving through air.
            return Vector3.zero;
        }
        var force = additionalData.physicEffectorPosition - position;
        force *= stiffness;
        return force;
    }

    private void OnCollisionEnter ( Collision collision )
    {
        if ( forceEnabled && collisionDetection && !m_Touched.Contains( collision.collider ) )
        {
            // Store the object that our effector is touching.
            m_Touched.Add( collision.collider );
        }
    }

    private void OnTriggerExit ( Collider other )
    {
        if ( forceEnabled && collisionDetection && m_Touched.Contains( other ) )
        {
            // Remove the object when our effector moves away from it.
            m_Touched.Remove( other );
        }
    }

}
源文件
本例中使用的最终场景和所有相关文件都可以从 Unity 的包 管理器中导入。
其他功能
- 按下
1或2键。 - 控制 触觉帧速率 与
LEFT/RIGHT钥匙 - 控制 物理帧速率 与
UP/DOWN钥匙 - 切换 碰撞检测 与
C键。 - 切换 力反馈 与
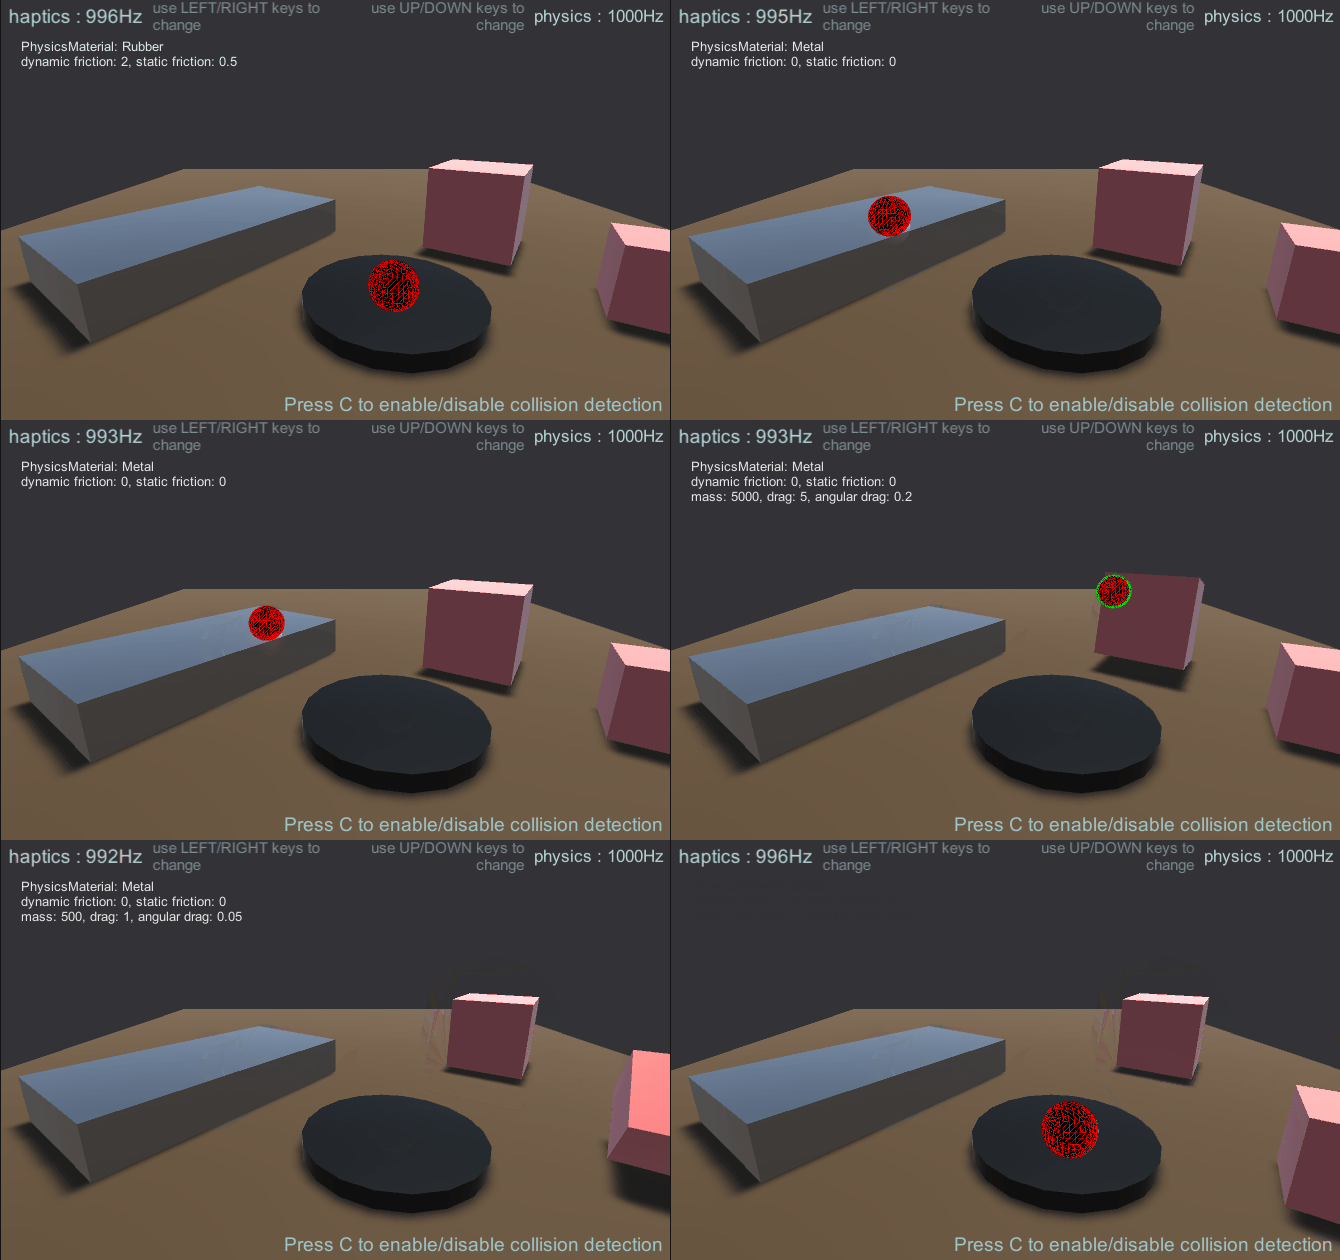
SPACE键。 - 准备好的场景,其中有静态和动态对象,它们具有不同的质量 和物理材料。
- 一个用户界面,用于显示被触物体的属性(静态/动态摩擦力、质量、阻力 质量、阻力......)。

